Why to compress images?
One of the most important tricks to make a web page load faster is to make its components smaller. Nowadays images are one of the most common assets in web pages and also the ones that then to accumulate a big part of the web page size. This means that if you reduce the size of the images, there will be a big impact in the size of the webpage and therefore it will load noticiable faster.
I've been compressing images in websites for a while and doing benchmarks before and after the image compression. In some websites I could double the performance only with image compression.
How to compress images?
There are several very good tools to compress images but usually they are only for a single type of them (jpeg, png, etc) and usually they are used against a single file. This makes hard to apply compression to a whole website, where you would need to find all the image files and compress them depending on its type.
For this reason I created an script that finds all images, makes a backup of them and compress them with the right tool depending on type. It also has some additional features that come very handy when you are dealing with image compression every day.
The image compression script
The compression script uses mainly 4 tools and all the compression merits goes to these tools: jpegoptim (by Timo Kokkonen), pngquant (by Kornel Lesiński), pngcrush (by Andrew Chilton) and gifsicle (by Eddie Kohler). You will need to install these tools in order for the script to work and the script itself will warn you if they are not installed. In a debian/ubuntu system you can install them with this command:
sudo apt-get install jpegoptim gifsicle pngquant pngcrush
Once you have these compression tools you can start using the compression script. Lets see the options we have.
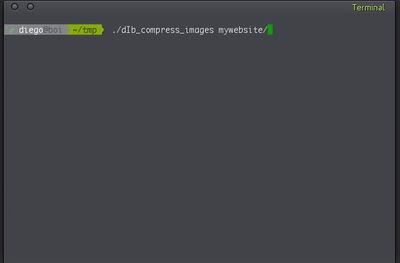
Use: ./dIb_compress_images <options> <path>

  Options:
     -r              Revert. Replace all processed images with their
                     backups.
     -j              Compress JPEG files.
     -p              Compress PNG files.
     -g              Compress GIF files.
     -L              Use lossless compression.
     -q              Quiet mode.
     -c              Continue an already started compression. This will
                     convert only not already backuped files.
     -t <percentage> Only use the converted file if the compression
                     saves more than  size. The files not
                     below  will appear as 0% in output.

NOTE: If none of -j, -p or -g are specified all of them (-j -p -g)
      will be used.
So yo can choose which types of images you want to compress (by default all of them) in a given path. The script will find those image types recursively inside that path and compress them.
You can compress them using lossy compression (default and recommended) or lossess (with -L flag). Usually using lossy compression makes no visual differences for the naked eye between the non-compressed and compressed version of a image. Lossy compression gives a much compressed version of the image so it is recommended.
For each image, the script will make a backup and this backup will not be ever overwritten so the backup will always be the original image. In case you want to revert the changes because you found some visual differences or whatever, you can use the -r flag over the same path, which will cause all the image backups to be restored.
By default, each time you execute the script on a given path, it will recompress all the images despite if they were already compressed or not. If you want to skip the already compressed images, you can use the -c flag. If you use it together with the quiet mode flag (-q) you can add the script to a cron task to periodically compress the images of your site.
You can also specify a percentage threshold so you can only keep the compressed version of an image if it saves at least that percentage in its used space with the -t parameter.
Here is an example output of the most basic execution. It is compressing images from a real website, altough I changed the image names in the script output for security reasons.
In this case, the images used 35MB but after compression they only use 12MB, that is a 33% of their original size!
Again, these compression rates are due to the fantastic tools the script uses. What I did was to gather information from many tests to find the best options for these tools to get the best balance between size and quality (and also compression time).
As always, let me know your thoughts and sugestions to improve it are more than welcome!
The script is available here: https://github.com/diego-treitos/dgtool/blob/master/compress_images/dIb_compress_images